It's update time on my overly ambitious 3D printer enclosure
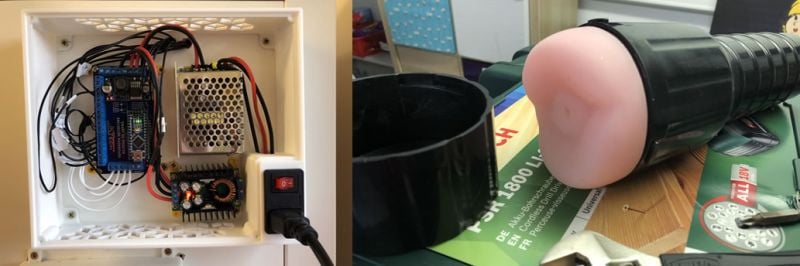
Well, I thought it was high time to give an update on my 3D printer enclosure at my office. Having just spent a week in hospital (long story) I am well behind where I would like to be in the build, but basically, it is all operational.
If you missed the first post in this series you can read it here - 3D Printer Enclosure.
I am waiting on the doors coming from a supplier that is cutting them to size for me (I pray that I measured them correctly).
I have magnetic reed switched to use on the doors so that if you open the main enclosure doors (either side), it will switch the LED lighting on to 100% white light so I can see what I am doing. Closing the doors resets the lights back to what they were doing before the door was opened.
Lighting
The LED lighting is fitted, with a 72 RGB LED strip in the top shelf area and also one in the main enclosure, and they look incredible when the printer enclosure is powered up.
I can select different lighting colours or have it slowly cycling through the entire colour spectrum. It even has some cool modes called breath and heartbeat. I will post a video of those when the doors arrive.
3D Printer Enclosure
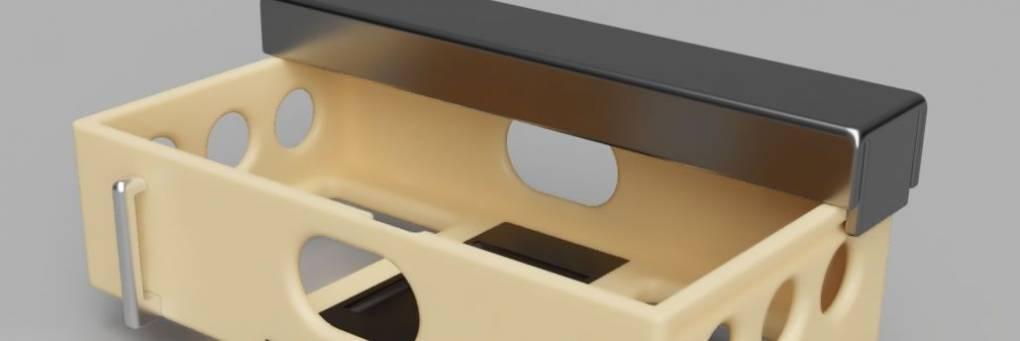
I want to make some things out of ABS and so I need to up my game a bit
I am a sucker for a project (or two). I love tweaking my 3D printers to get the best possible quality I can out of them, and I have learned so much through doing so.
My next printer project is going to be constructing an enclosure for two of them. This will tidy my office up somewhat, but also it will allow me to experiment with printing with some other materials.
I am going to be printing in PETG first, and then I will be experimenting with ABS as a material for my products. Both of these are more difficult to print than my usual PLA with ABS having the most challenges to overcome.
So read on to find out why and how I am going to tackle this project.
Flexible E-Stim Products
I am working on some pretty neat designs and products
I have been designing and making 3D printable electrodes and more importantly, electrode insulators for over a year now.
Over that time, my skills and knowledge about not only designing these items but enabling the designs to be easily printed on hobby-level 3D printers have improved considerably.
I still release my designs to the community for free personal use as I am a big believer of giving back to the community.
I also sell ready-made insulators and the funds from these products helps me run my site and also upgrade my equipment so that I can create even better and more intricate kink and e-stim products.
I have upgraded my Ender 3 printer to a direct drive system, it is now controlled by a 32-bit processor making it better in almost every way.
One of my reasons for upgrading from the standard bowden drive system for the filament to a direct drive system is so I can use some really nice materials.

I am doing my own little bit to help keep NHS staff safe by making PPE for them
With the pandemic running its cause all over the globe, healthcare professionals are at the front lines of the battle against this virulent foe. Here in the UK, we are incredibly proud of all the NHS staff and critical workers doing their bit to keep everyone safe and sound.
The NHS staff, in particular, are in harm's way, caring for patients with Covid-19, and they rely on personal protective equipment (PPE) to keep them safe.
This vital equipment is becoming in short supply, and small businesses and individuals who can help are rallying to the cause.
If you enjoy stimming while walking around then this may be of interest to you
The 2B E-stim Control Box is an absolutely fantastic piece of equipment, and lots of people enjoy stimming while being mobile.
I decided to design my own 3D printable belt clip and holder for my 2B Control Box.
From the outset I decided on the following criteria:
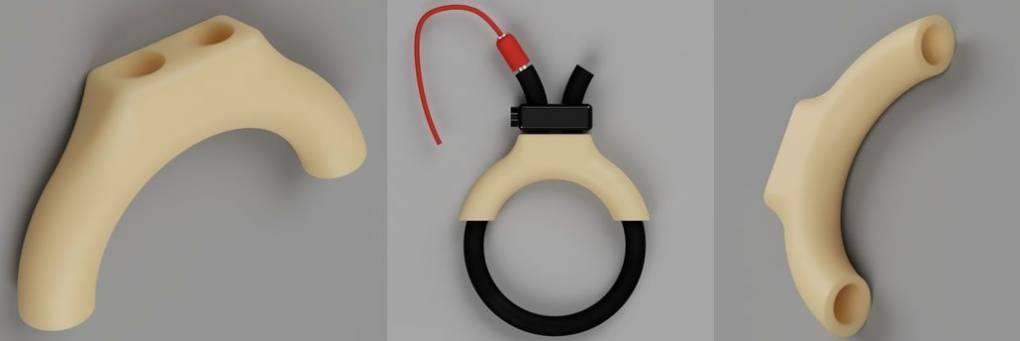
Penis play made easier and better with a 3D printed cock loop insulator
I had so much fun making my Bumble Bee Tri-polar estim electrode, and my Curly Wurly Bi-polar Electrode.
So, after seeing a fantastic post by miralicious90 on Smartstim.com where he designed an insulator for his cock ring I thought I would have a go at that too. After many trials and errors, basically because I am still a bit of a techno-muppet where 3D design is concerned I eventually designed this. I introduce to you the 3D Printable Cock Ring Insulator.
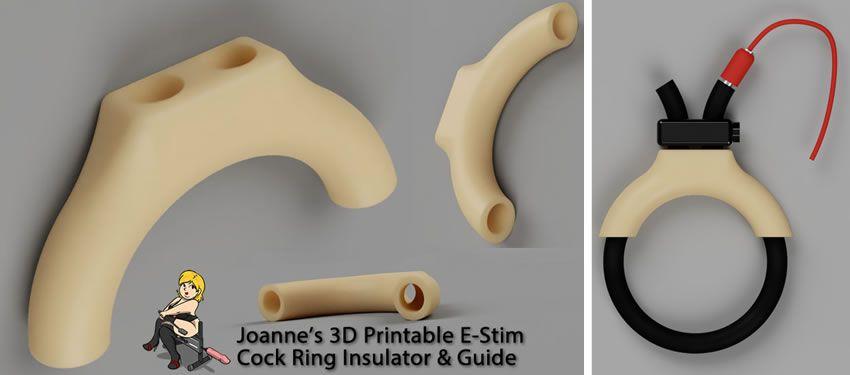
Behold, Joanne's 3D printable cock ring insulator
DIY Bi-Polar Estim Labia Shield - The Panty Pleaser
For Teasing Your Outer Labia
I had so much fun making my Bumble Bee Tri-polar estim electrode, and my Curly Wurly Bi-polar Electrode. So I was delighted when the very talented e-stimson on smartstim.com got in touch with me to tell me that his latest design was now live.
I just love his electrode designs, they are created to be printed out at home using a 3D printer and some basic materials. His Curly Wurly design is a favourite of mine, and I had so much fun building it myself. I couldn't wait to get started on this one, the Panty Pleaser as I am calling it.

I just love this render by e-stimson of his labia shield design
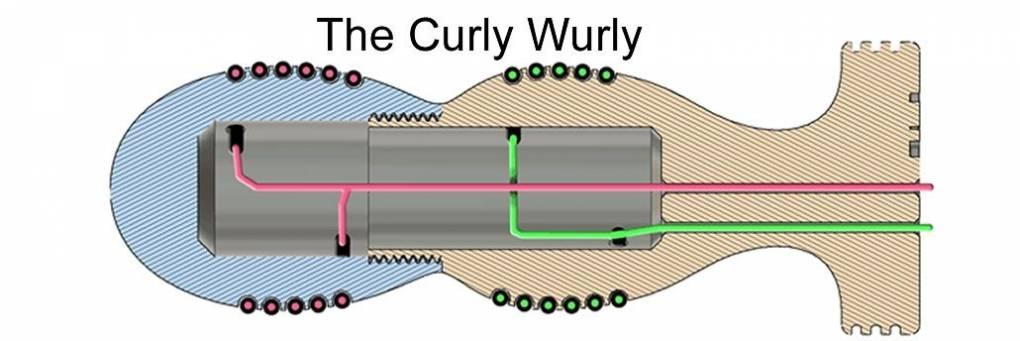
DIY Bi-Polar Insertable Electrode - The Curly Wurly
For Intense Vaginal Or Anal Penetrative E-Stim Pleasure
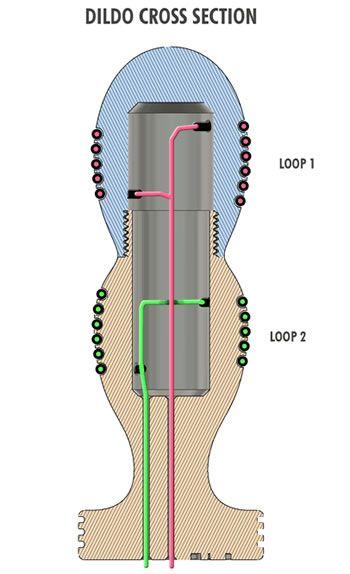 After making my Bumble Bee Tri-polar estim electrode, I was contacted by the very talented e-stimson on smartstim.com as he tweaked my design for me making it even better - thank you.
He also came up with this fantastic design for a bipolar insertable electrode for anal and vaginal use. I was immediately intruiged, and he gave me a copy of the design files so that I could 3D print and make one for myself.
This article is going to cover the build of this electrode as there is quite a lot going on with this one, it is much more difficult than my Bumble Bee Electrode for a number of reasons.
Firstly, the design is complicated with screw threads and spiralling channels which will need to be printed with supports. This is to compensate for a 3D printers inability to print an overhang over about 60 degrees. These supports are used to support overhangs such as the ones found in the spiralling groove, and they mean much more post print work is needed to remove them and clean up the model.
So a lot of sanding will be needed to smooth everything out once printed.
The next problem is 3D printed objects by their very nature are porous, and that is a bad thing for insertable objects as you have to seal the surface to prevent bacteria and mould growing inside.
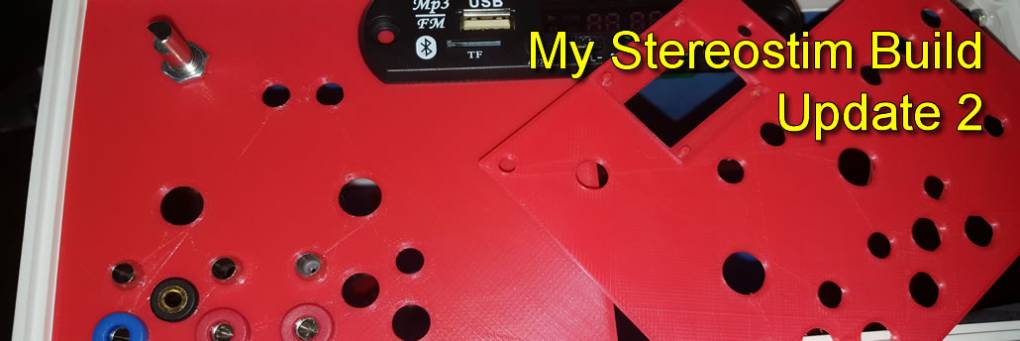
My Stereostim Estim Control Box Build Part 2
This reviewer and power tools just don't get on
You can find the first article in this build diary in My Stereostim Estim Control Box Build Part 1
This project has been on the back burner for a while now for a number of reasons. Firstly time has been an issue for me, with so many new products arriving for review it is pretty much flat out on that aspect of my site. You could say that I am a victim of my own success.
The second reason is that I well and truly messed up when trying to drill the front panel for the control box. There was I thinking using a pillar drill would be easy but I was doing something wrong. Maybe the wrong drill speed or whatever. In any case, the mess I made of the panel put a real downer on things, and I turned my attention to my reviewing. Vowing to get back to the build when I had a solution for the panel.
I now have one such solution, regular readers will know that I now have a 3D printer (an Ender 3 to be precise) and that has been a godsend for me with this project.
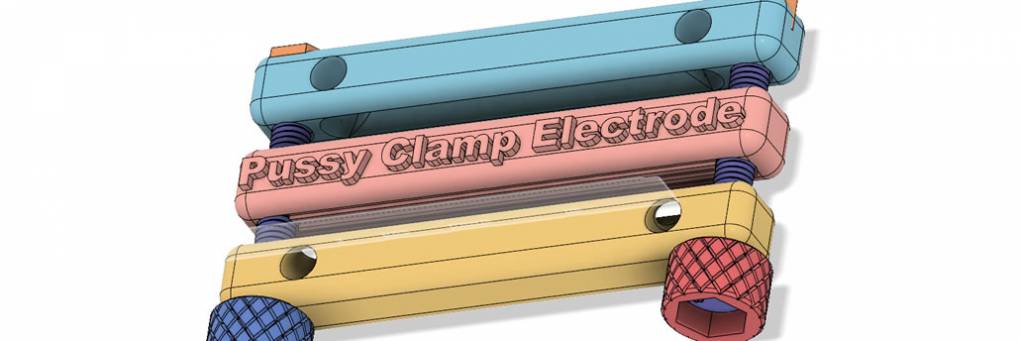
DIY Pussy Clamp Electrode
For BDSM clamping and stimming of the labia
After having so much fun creating my DIY Clitrode I decided that making DIY eletrodes is something that I want to explore and as I now own a 3D printer many more opportunities for doing so have just sprung up. My next electrode is a BDSM pussy lip clamp that can also be used for e-stimming.
It was inspired by the amazing creations of @_DeviantDesigns (Check out their Patreon Page and show them some love), in particular their pussy clamp EM60 mounting box. Check out some of their incredible creations here - There’s no limit to the connected sex toys you can build at home.
So, as I am learning 3D design the hard way (trial and error), this was a huge leap forward for me and I decided to create a basic pussy lip clamp that uses two 6mm bolts. The center piece would have teeth to aid in grabbing the skin and preventing it slipping off due to lube and vag-goo. The outer sections are designed to hold two lengths of 6mm conductive rubber tubing.
This rubber tubing will have a wire threaded through it to remove any resistance issues with the rubber and to ensure there are no hot spots. In use it is deisgned to clamp the labia and then allow for you to attach the rubber tubing to your e-stim control box for some added 'stimulation'. It should be a lot of fun, especially in BDSM scenes.
This was the first prototype design, the little icons at the bottom of the pic show how many steps it took to sculpt in 3D using Fusion 360:
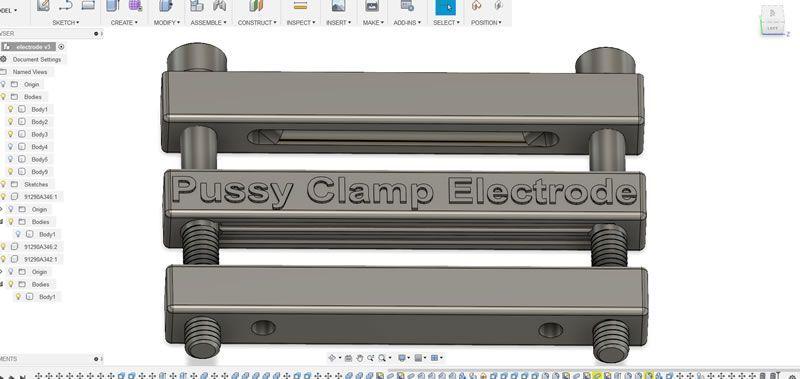
Here is a sneak peek at the design I have drawn in Fusion 360
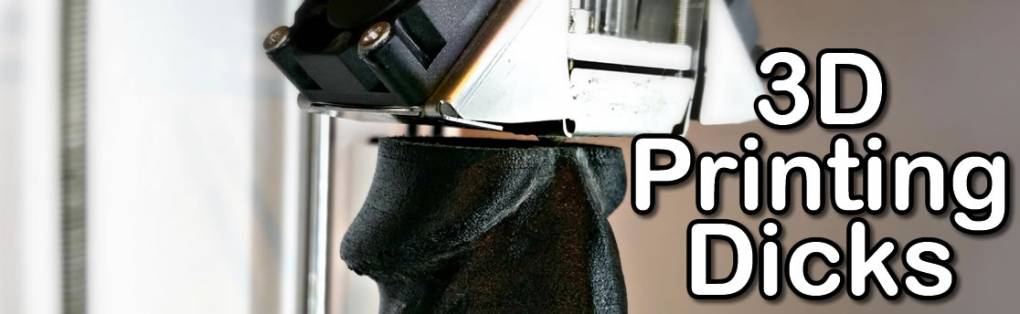
Making 3D printed dildos and bondage equipment is so much fun
Anyone who reads my blog and my reviews knows that I do love a good bit of quim sticking fun. I relish using highly detailed and textured dildos and other sex toys.
For a while now, I have contemplated getting myself a 3D printer so that I can experiment and have lots of kinky fun with one. I have been inspired by Deviant Designs. Their kinky fuckery with 3D printed products is legendary, and they have spurred me into action.
 How to resolve AdBlock issue?